Deploying to Google Cloud Platform (GCP)
This guide describes how to build and run your Swift Server on serverless architecture with Google Cloud Build and Google Cloud Run. We’ll use Artifact Registry to store the Docker images.
Google Cloud Platform Setup
You can read about Getting Started with GCP in more detail. In order to run Swift Server applications, we need to:
- enable Billing (requires a credit card). Note that when creating a new account, GCP provides you with $300 of free credit to use in the first 90 days. You can follow this guide for free for a new account. Everything in this guide should fall into the “Free Tier” category at GCP (120 build minutes per day, 2 million Cloud Run requests per month Free Tier Usage Limits)
- enable the Cloud Build API
- enable the Cloud Run Admin API
- enable the Artifact Registry API
- create a Repository in the Artifact Registry (Format: Docker, Region: your choice)
Project Requirements
Please verify that your server listens on 0.0.0.0, not 127.0.0.1 and it’s
recommended to use the environment variable $PORT instead of a hard-coded
value. For the workflow to pass, two files are essential, both need to be in the
project root:
- Dockerfile
- cloudbuild.yaml
Dockerfile Dockerfile section" href="#dockerfile">
You should test your Dockerfile with docker build . -t test and
docker run -p 8080:8080 test and make sure it builds and runs locally.
The Dockerfile is the same as in the packaging guide.
Replace <executable-name> with your executableTarget (ie. “Server”):
#------- build -------
FROM swift:centos as builder

# set up the workspace
RUN mkdir /workspace
WORKDIR /workspace

# copy the source to the docker image
COPY . /workspace

RUN swift build -c release --static-swift-stdlib

#------- package -------
FROM centos:8
# copy executable
COPY --from=builder /workspace/.build/release/<executable-name> /

# set the entry point (application name)
CMD ["<executable-name>"]
cloudbuild.yaml cloudbuild.yaml section" href="#cloudbuildyaml">
The cloudbuild.yaml files contains a set of steps to build the server image
directly in the cloud and deploy a new Cloud Run instance after the successful
build. ${_VAR} are
“substitution variables”
that are available during build time and can be passed on into the runtime
environment in the “deploy” phase. We will set the variables later when we
configure the Build Trigger (Step 5).
steps:
  - name: 'gcr.io/cloud-builders/docker'
    entrypoint: 'bash'
    args:
      - '-c'
      - |
        docker pull ${_REGION}-docker.pkg.dev/$PROJECT_ID/${_REPOSITORY_NAME}/${_SERVICE_NAME}:latest || exit 0
  - name: 'gcr.io/cloud-builders/docker'
    args:
      - build
      - -t
      - ${_REGION}-docker.pkg.dev/$PROJECT_ID/${_REPOSITORY_NAME}/${_SERVICE_NAME}:$SHORT_SHA
      - -t
      - ${_REGION}-docker.pkg.dev/$PROJECT_ID/${_REPOSITORY_NAME}/${_SERVICE_NAME}:latest
      - .
      - --cache-from
      - ${_REGION}-docker.pkg.dev/$PROJECT_ID/${_REPOSITORY_NAME}/${_SERVICE_NAME}:latest
  - name: 'gcr.io/cloud-builders/docker'
    args:
      [
        'push',
        '${_REGION}-docker.pkg.dev/$PROJECT_ID/${_REPOSITORY_NAME}/${_SERVICE_NAME}:$SHORT_SHA'
      ]
  - name: 'gcr.io/cloud-builders/gcloud'
    args:
      - run
      - deploy
      - swift-service
      - --image=${_REGION}-docker.pkg.dev/$PROJECT_ID/${_REPOSITORY_NAME}/${_SERVICE_NAME}:$SHORT_SHA
      - --port=8080
      - --region=${_REGION}
      - --memory=512Mi
      - --platform=managed
      - --allow-unauthenticated
      - --min-instances=0
      - --max-instances=5
images:
  - '${_REGION}-docker.pkg.dev/$PROJECT_ID/${_REPOSITORY_NAME}/${_SERVICE_NAME}:$SHORT_SHA'
  - '${_REGION}-docker.pkg.dev/$PROJECT_ID/${_REPOSITORY_NAME}/${_SERVICE_NAME}:latest'
timeout: 1800s
The steps in detail
- Pull the latest image from the Artifact Registry to retrieve cached layers
- Build the image with
$SHORT_SHAandlatesttag - Push the image to the Artifact Registry
- Deploy the image to Cloud Run
images specifies the build images to store in the registry. The default
timeout is 10 minutes, so we’ll need to increase it for Swift builds. We use
8080 as the default port here, though it’s recommended to remove this line and
have the server listen on $PORT.
Deployment
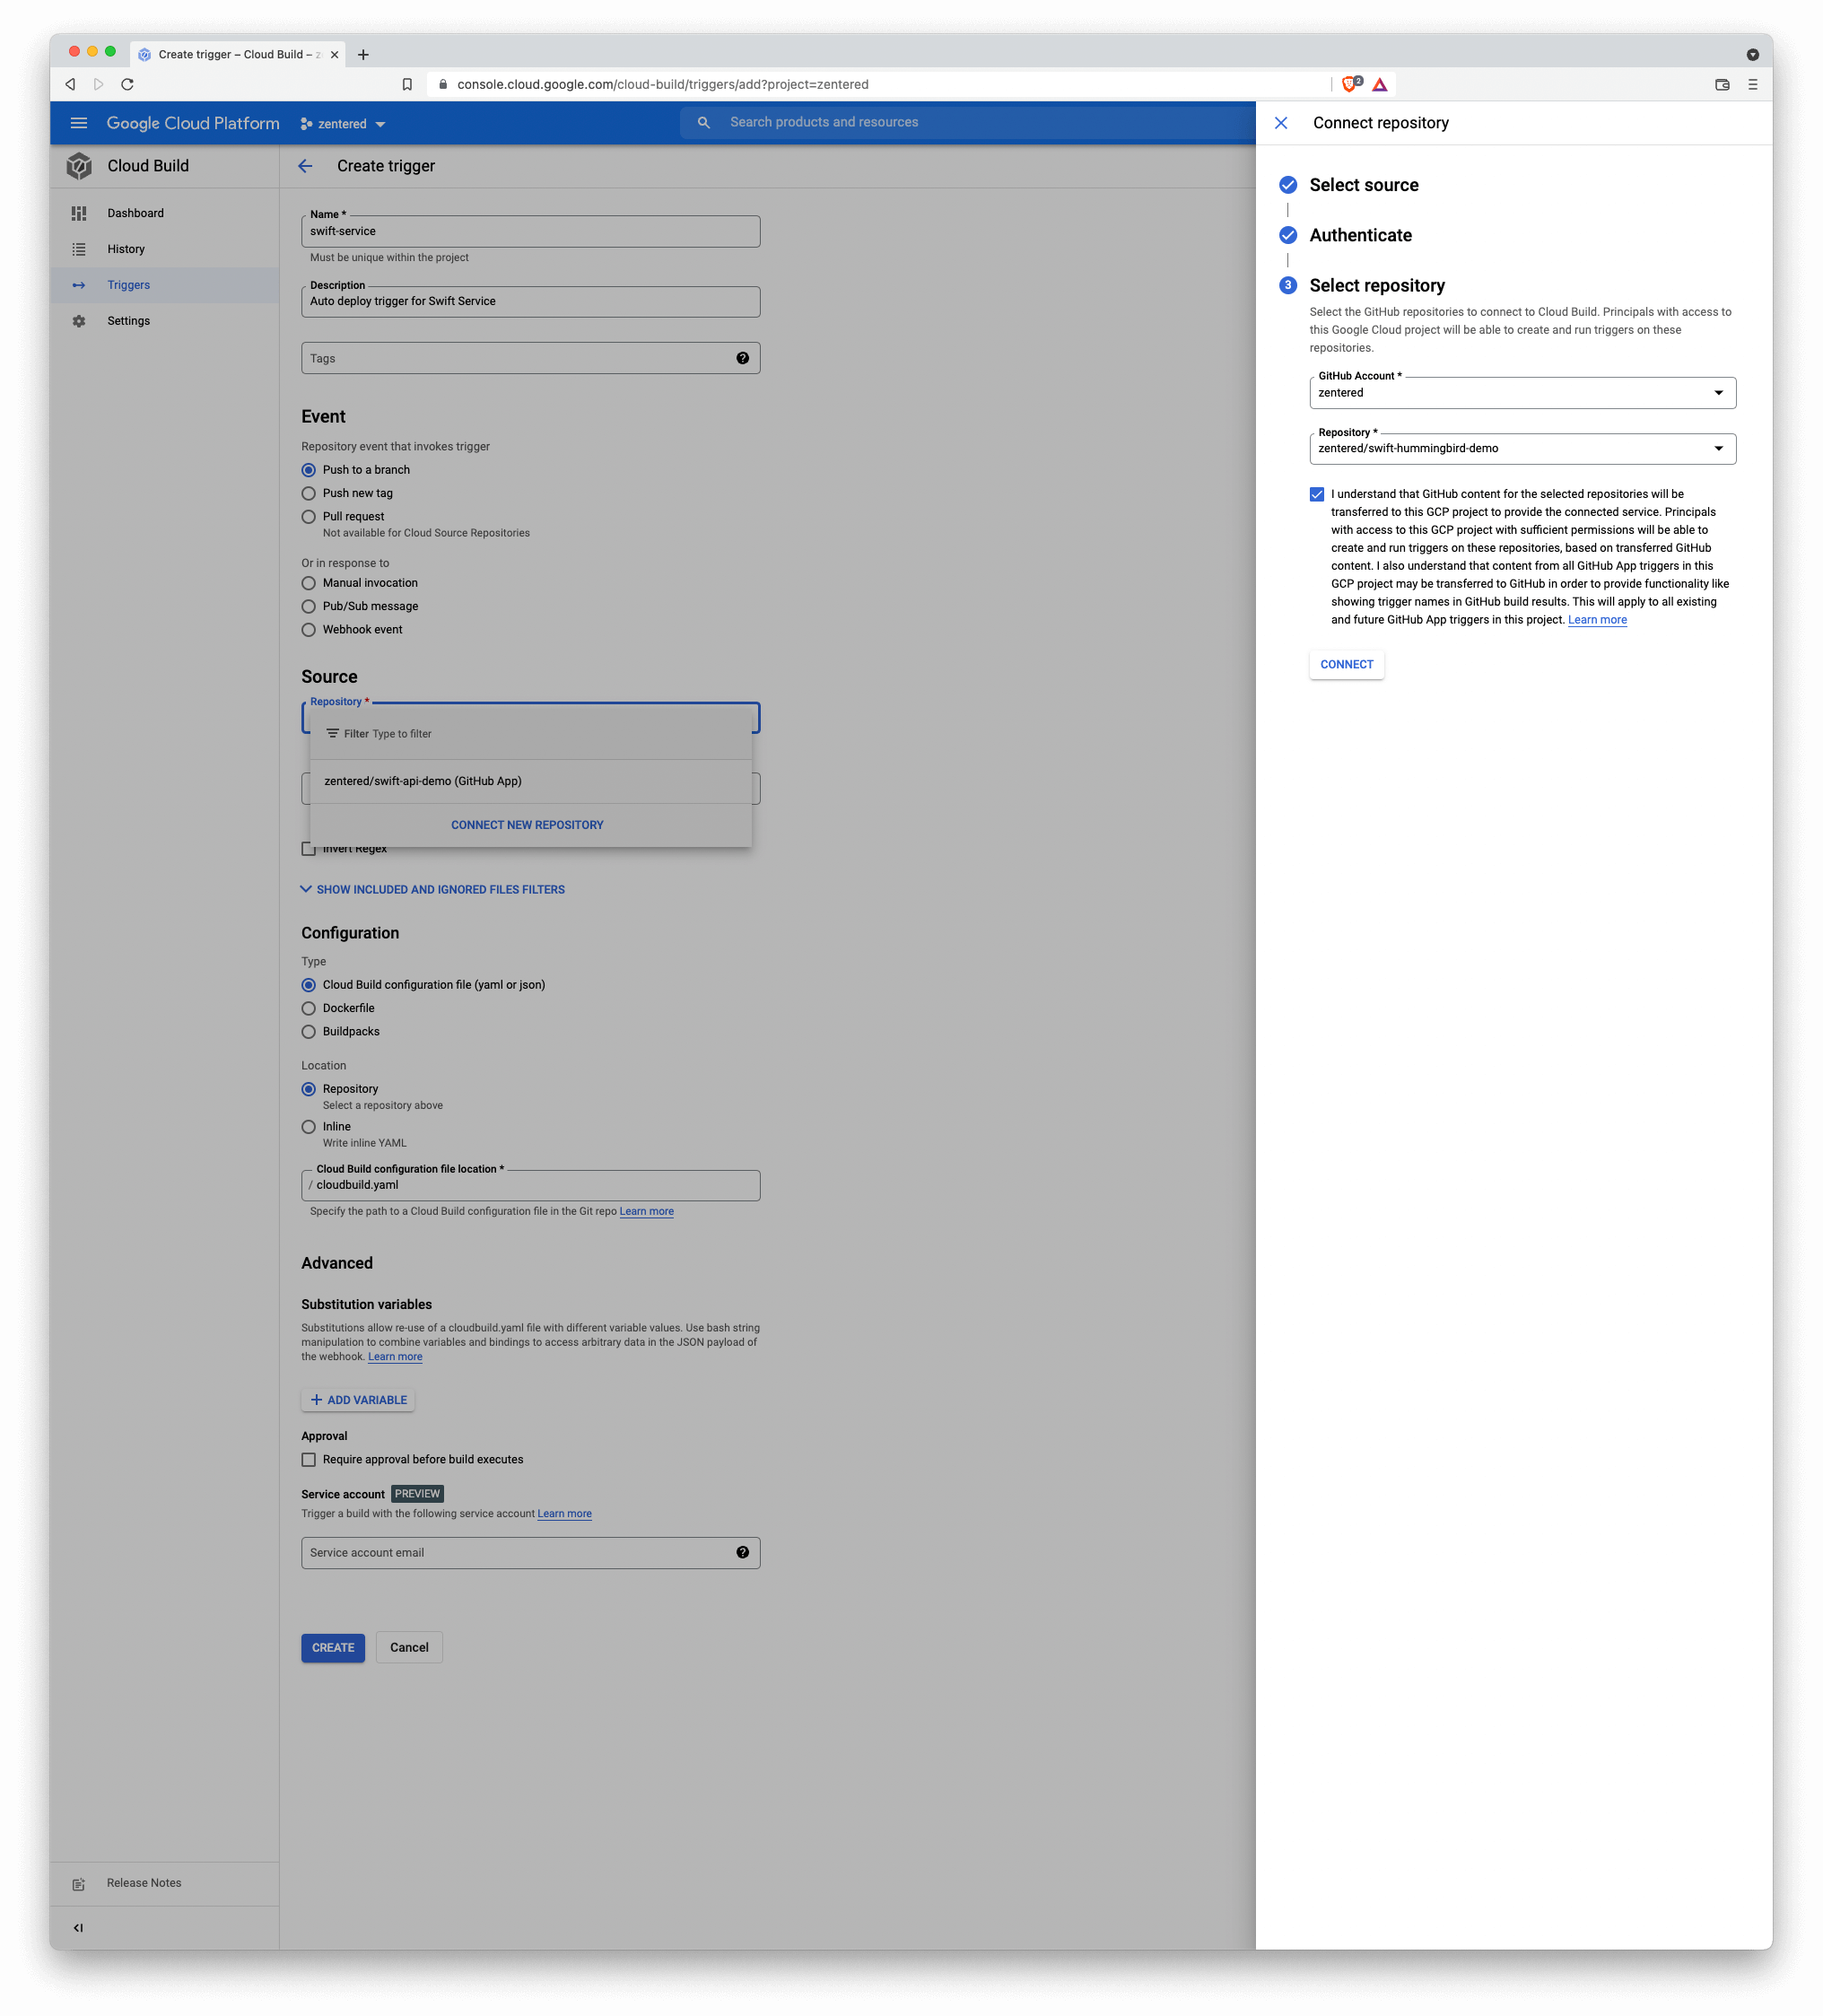
Push all files to a remote repository. Cloud Build currently supports, GitHub, Bitbucket and GitLab. now) and head to Cloud Build Triggers and click “Create Trigger”:
- Add a name and description
- Event: “Push to a branch” is active
- Source: “Connect New Repository” and authorize with your code provider, and add the repository where your Swift server code is hosted. Note that you need to configure GitHub, GitLab or Bitbucket to allow GCP access first.
- Configuration: “Cloud Build configuration file” / Location: Repository
- Advanced:
Substitution variables:
You need to set the variables for region, repository name and service name
here. You can pick a
region of your choice (ie.
us-central1). All custom variables must start with an underscore (_REGION)._REPOSITORY_NAMEand_SERVICE_NAMEare up to you. If you use environment variables for example to connect to a database or 3rd party services, you can set the values here too. - “Create”
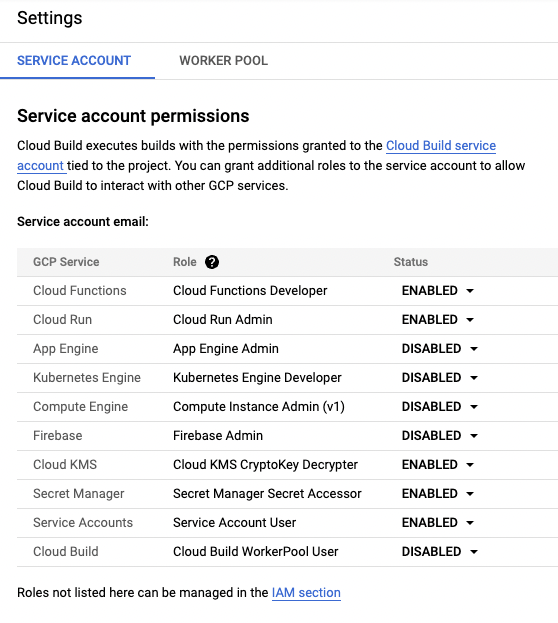
As a last step before deploying the new service, go to the Cloud Build Settings and make sure “Cloud Run” is enabled. This gives Cloud Build the necessary IAM permissions to deploy Cloud Run services.
In the Trigger overview page, you should see your new “swift-service” trigger.
Click on “RUN” on the right to start the trigger manually from the main
branch. With a simple Hummingbird project the build takes about 7-8 minutes.
Vapor takes about 25 minutes on the standard/small build machines, which are
fairly slow. “Jordane” from the Vapor Discord community
recommends using machineType: E2_HIGHCPU_8
in the cloudbuild.yaml to speed up deployments:
options:
  machineType: 'E2_HIGHCPU_8'
After a successful build you should see the service URL in the build logs:
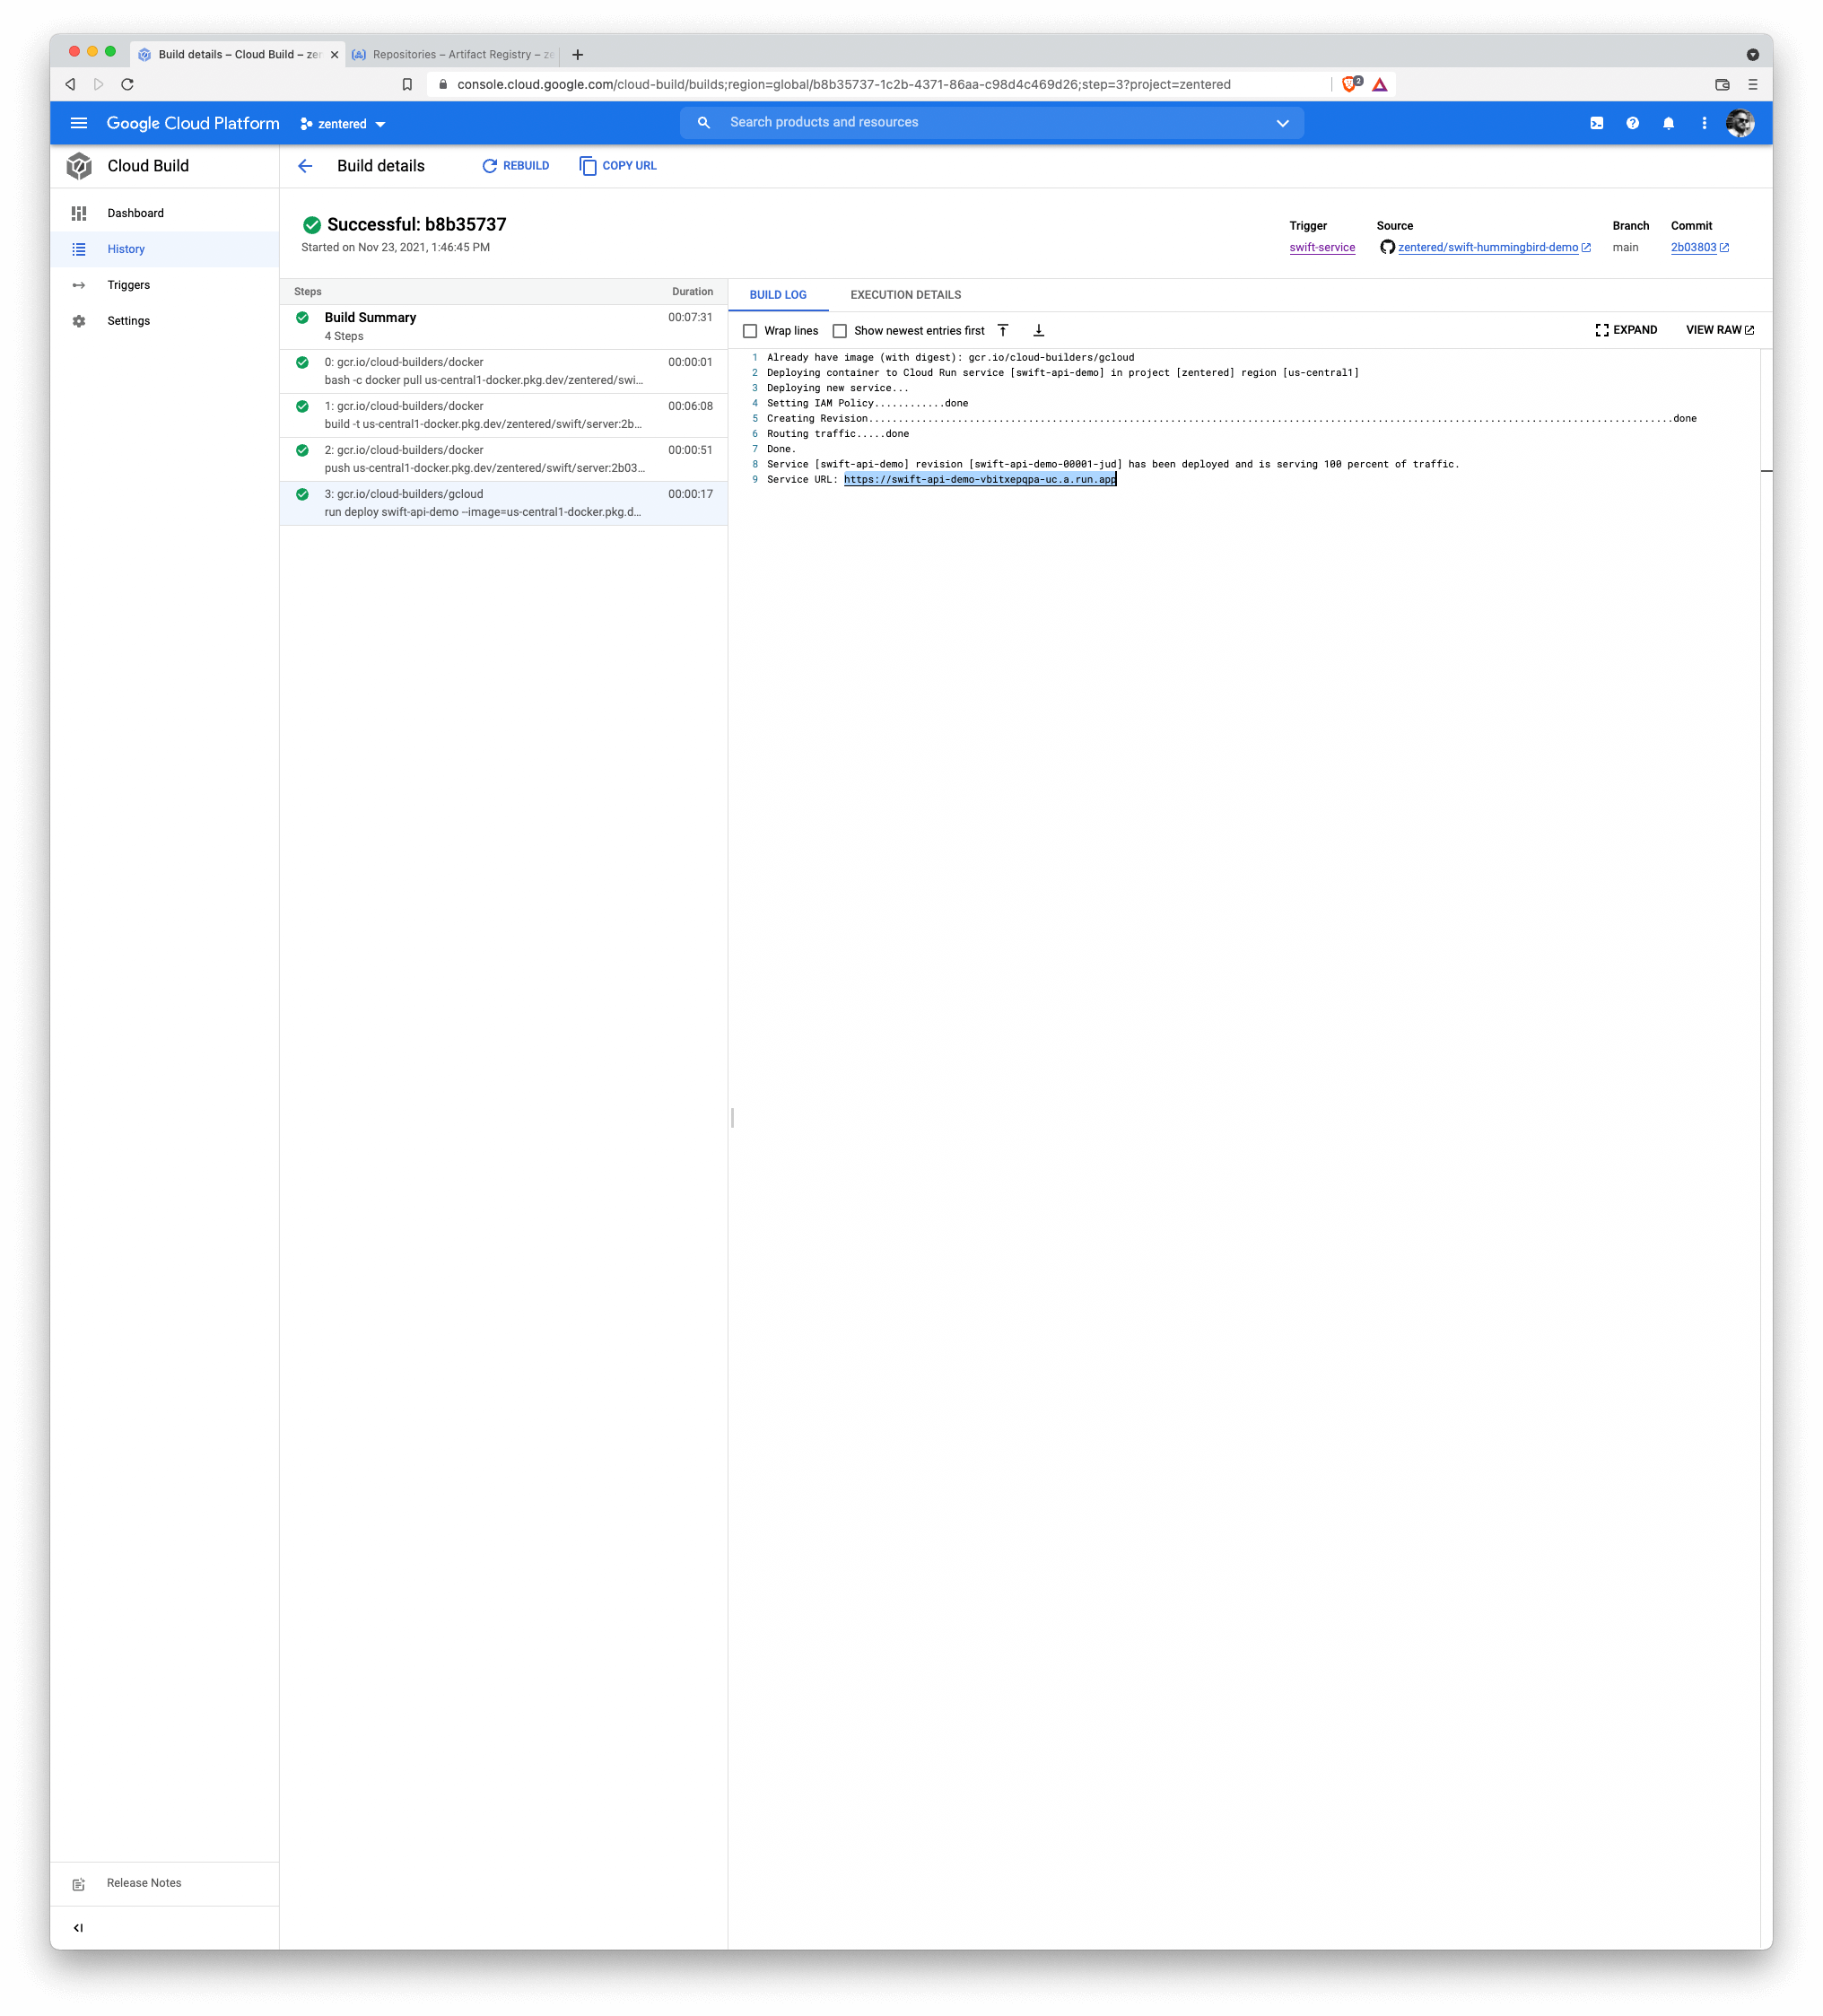
You can head over to Cloud Run and see your service running there:
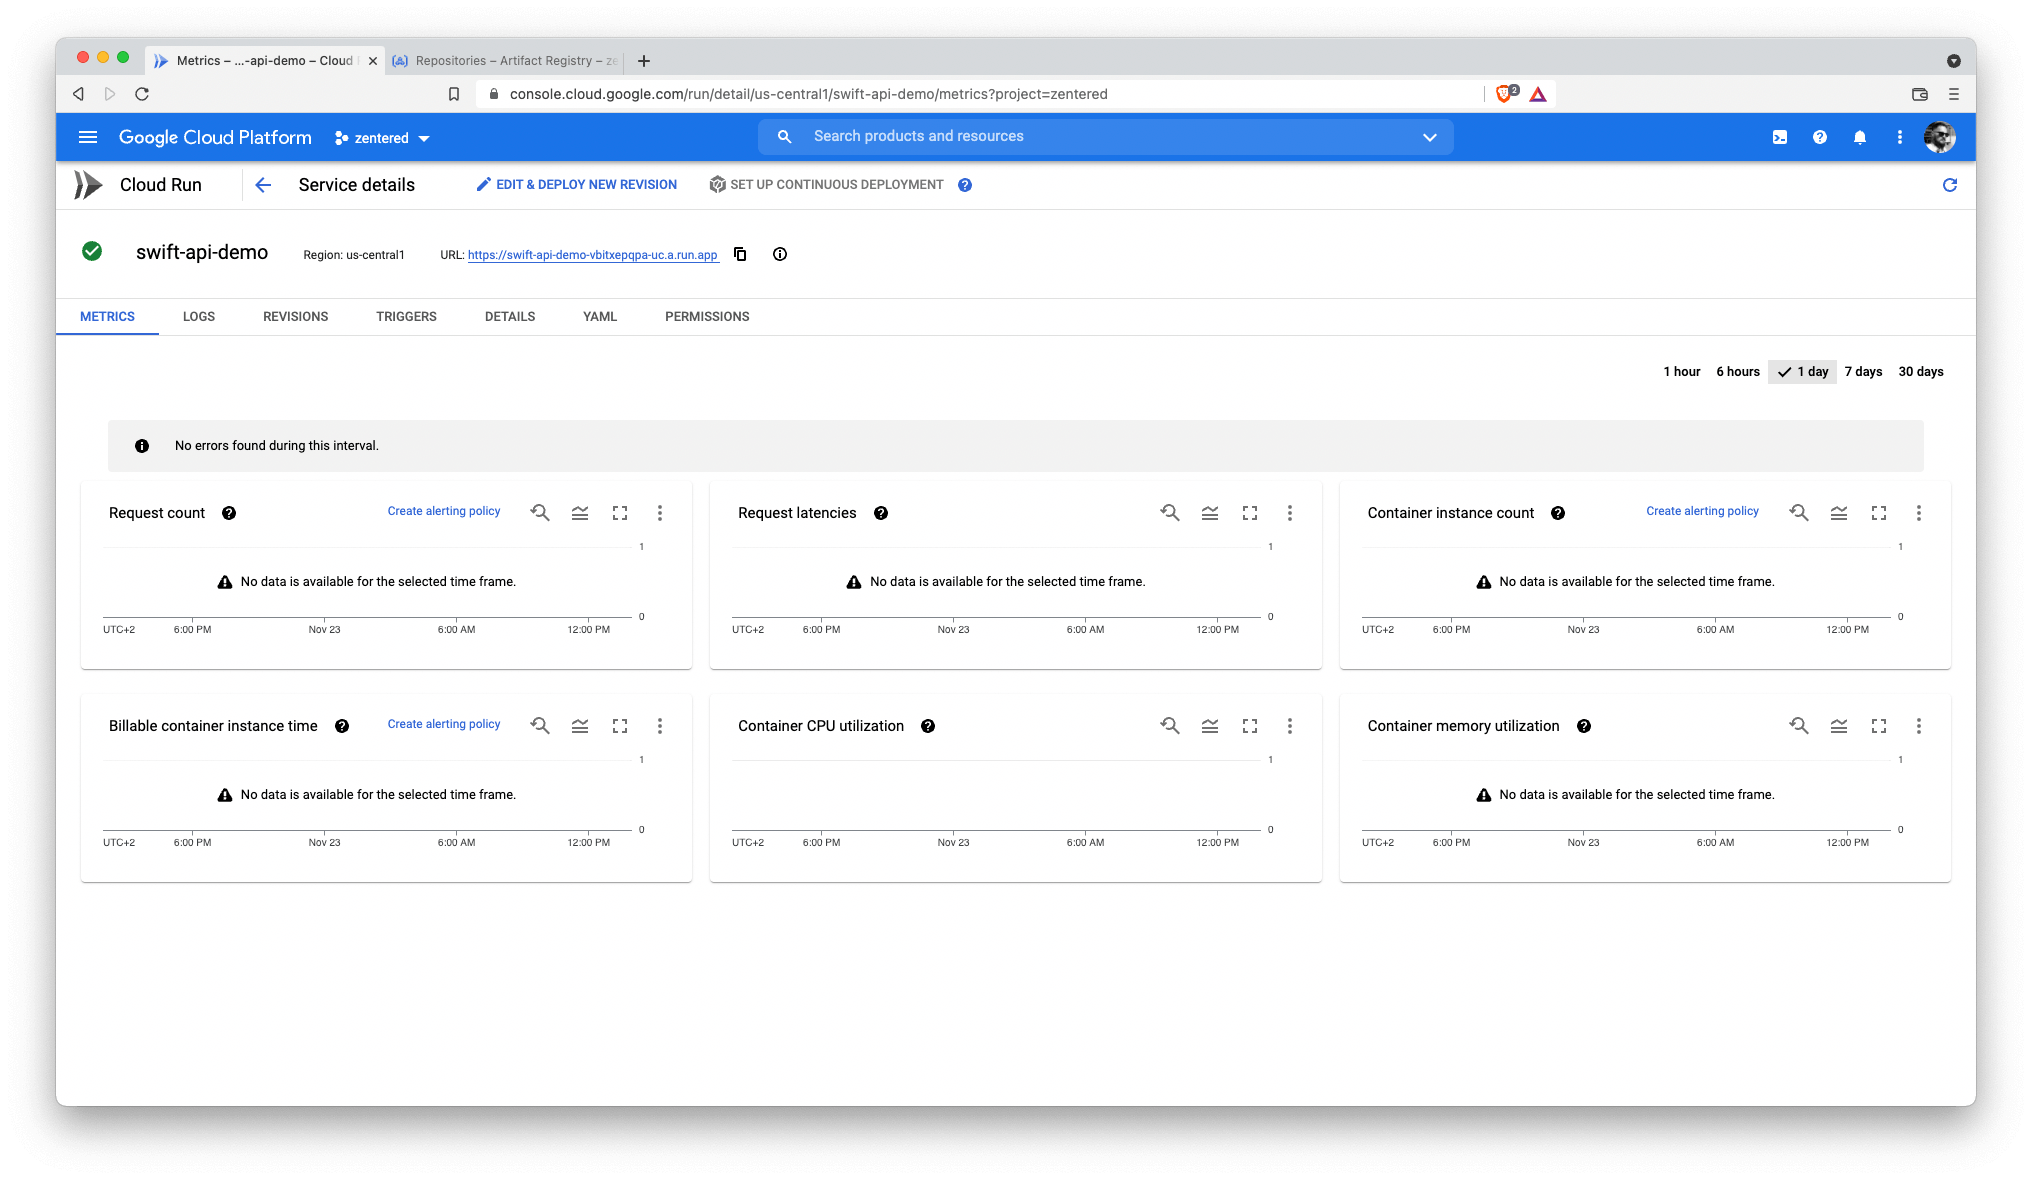
The trigger will deploy every new commit on main. You can also enable Pull
Request triggers for feature-driven workflows. Cloud Build also allows
blue/green builds, auto-scaling and much more.
You can now connect your custom domain to the new service and go live.
Cleanup
- delete the Cloud Run service
- delete the Cloud Build trigger
- delete the Artifact Registry repository