Deploying on Ubuntu
Once you have your Ubuntu virtual machine ready, you can deploy your Swift app. This guide assumes you have a fresh install with a non-root user named swift. It also assumes both root and swift are accessible via SSH. For information on setting this up, check out the platform guides:
The packaging guide provides an overview of available deployment options. This guide takes you through each deployment option step-by-step for Ubuntu specifically. These examples will deploy SwiftNIO’s example HTTP server, but you can test with your own project.
Binary Deployment
This section shows you how to build your app locally and deploy just the binary.
Build Binaries
The first step is to build your app locally. The easiest way to do this is with Docker. For this example, we’ll be deploying SwiftNIO’s demo HTTP server. Start by cloning the repository.
git clone https://github.com/apple/swift-nio.git
cd swift-nio
Once inside the project folder, use the following command to build the app though Docker and copy all build artifacts into .build/install. Since this example will be deploying to Ubuntu 18.04, the -bionic Docker image is used to build.
docker run --rm \
  -v "$PWD:/workspace" \
  -w /workspace \
  swift:5.7-bionic  \
  /bin/bash -cl ' \
     swift build && \
     rm -rf .build/install && mkdir -p .build/install && \
     cp -P .build/debug/NIOHTTP1Server .build/install/ && \
     cp -P /usr/lib/swift/linux/lib*so* .build/install/'
Tip: If you are building this project for production, use
swift build -c release, see building for production for more information.
Notice that Swift’s shared libraries are being included. This is important since Swift is not ABI stable on Linux. This means Swift programs must run against the shared libraries they were compiled with.
After your project is built, use the following command to create an archive for easy transport to the server.
tar cvzf hello-world.tar.gz -C .build/install .
Next, use scp to copy the archive to the deploy server’s home folder.
scp hello-world.tar.gz swift@<server_ip>:~/
Once the copy is complete, login to the deploy server.
ssh swift@<server_ip>
Create a new folder to hold the app binaries and decompress the archive.
mkdir hello-world
tar -xvf hello-world.tar.gz -C hello-world
You can now start the executable. Supply the desired IP address and port. Binding to port 80 requires sudo, so we use 8080 instead.
./hello-world/NIOHTTP1Server <server_ip> 8080
You may need to install additional system libraries like libxml or tzdata if your app uses Foundation. The system dependencies installed by Swift’s slim docker images are a good reference.
Finally, visit your server’s IP via browser or local terminal and you should see a response.
$ curl http://<server_ip>:8080
Hello world!
Use CTRL+C to quit the server.
Congratulations on getting your Swift server app running on Ubuntu!
Source Deployment
This section shows you how to build and run your project on the deployment server.
Install Swift
Now that you’ve created a new Ubuntu server you can install Swift. You must be logged in as root (or separate user with sudo access) to do this.
ssh root@<server_ip>
Swift Dependencies
Install Swift’s required dependencies.
sudo apt update
sudo apt install clang libicu-dev build-essential pkg-config
Download Toolchain
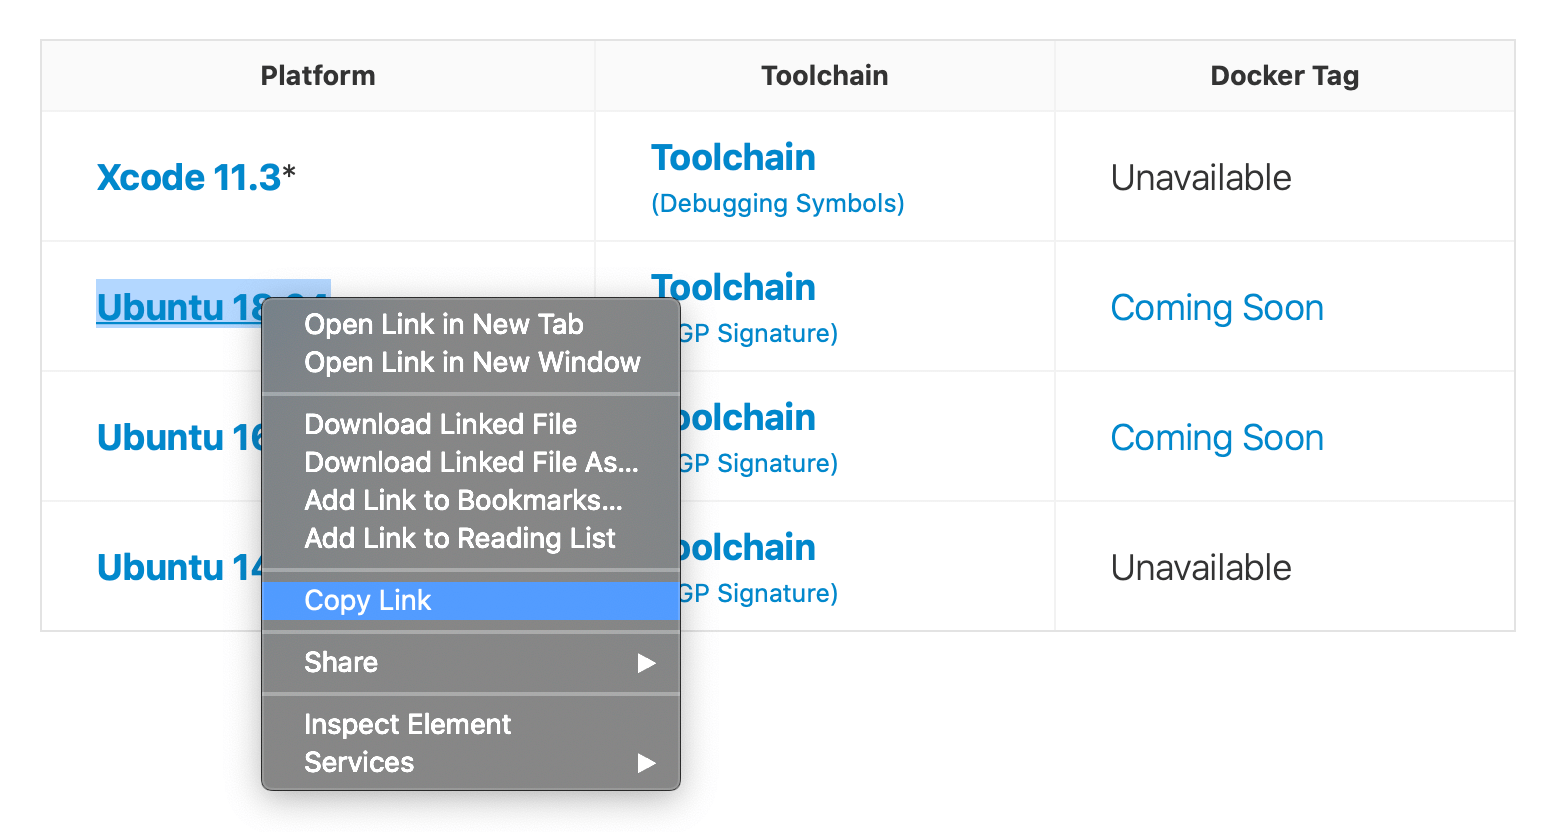
This guide will install Swift 5.2. Visit the Swift Downloads page for a link to latest release. Copy the download link for Ubuntu 18.04.

Download and decompress the Swift toolchain.
wget https://swift.org/builds/swift-5.2-release/ubuntu1804/swift-5.2-RELEASE/swift-5.2-RELEASE-ubuntu18.04.tar.gz
tar xzf swift-5.2-RELEASE-ubuntu18.04.tar.gz
Note: Swift’s Using Downloads guide includes information on how to verify downloads using PGP signatures.
Install Toolchain
Move Swift somewhere easy to access. This guide will use /swift with each compiler version in a subfolder.
sudo mkdir /swift
sudo mv swift-5.2-RELEASE-ubuntu18.04 /swift/5.2.0
Add Swift to /usr/bin so it can be executed by swift and root.
sudo ln -s /swift/5.2.0/usr/bin/swift /usr/bin/swift
Verify that Swift was installed correctly.
swift --version
Setup Project
Now that Swift is installed, let’s clone and compile your project. For this example, we’ll be using SwiftNIO’s example HTTP server.
First let’s install SwiftNIO’s system dependencies.
sudo apt-get install zlib1g-dev
Clone & Build
Now that we’re done installing things, we can switch to a non-root user to build and run our application.
su swift
cd ~
Clone the project, then use swift build to compile it.
git clone https://github.com/apple/swift-nio.git
cd swift-nio
swift build
Tip: If you are building this project for production, use
swift build -c release, see building for production for more information.
Run
Once the project has finished compiling, run it on your server’s IP at port 8080.
.build/debug/NIOHTTP1Server <server_ip> 8080
If you used swift build -c release, then you need to run:
.build/release/NIOHTTP1Server <server_ip> 8080
Visit your server’s IP via browser or local terminal and you should see a response.
$ curl http://<server_ip>:8080
Hello world!
Use CTRL+C to quit the server.
Congratulations on getting your Swift server app running on Ubuntu!